
The first project I have to share with you today is a layout of my two youngest Grandsons, Ethan & Elias. I used some rich earthy colors for my projects as I love Fall!!


To alter the chipboard I gessoed them, and then painted with some Tim Holtz Distress Stain (Walnut Stain). I then applied some Folk Art Burnt Umber paint with a fanned brush. After that I applied a light coat of Tim Holtz Distress Stain (Copper) and wiped the excess away. To finish them off I applied some Liquid Pearls (Ocean Blue) around the edges.

IDW 0034

12 Buttons Onboard
IDS0031
Products Used:
Bo Bunny Et Cetera Paper Collection
Tim Holtz Flourish Die Cut
Tim Holtz Envelope Die Cut
Tim Holtz Distress Flowers Die Cut
Tim Holtz Gears Die Cut
Tim Holtz Distress Inks (Vintage Photo, Walnut Stain, and Soot Black)
Tim Holtz Stick Pins
Folk Art Brown Paint
The 2nd project I have to share with you today is a mini book with a book cover that I made. This was so much fun, I'm just loving mini albums right now. I made this one for my Grandson Ethan to give to his teacher this Thanksgiving!! I hope you enjoy!!
These are photos of the book cover that I made for the Mini Book along with the ribbon and charms along the spine of the book.


And here's the first page of the Mini Book. I loved using the small ID Alphas for this. The red matched the papers just perfectly!


And here's the next 2 pages, with a flip up card for journaling.


The next page has a pocket for several tags. The banner was distressed and then I applied a crackle paint.

And the next page is a "Mini Album" within the Mini Book

And here's an example of the pages which all have pockets.

Photos of the tags in the Mini Album pockets
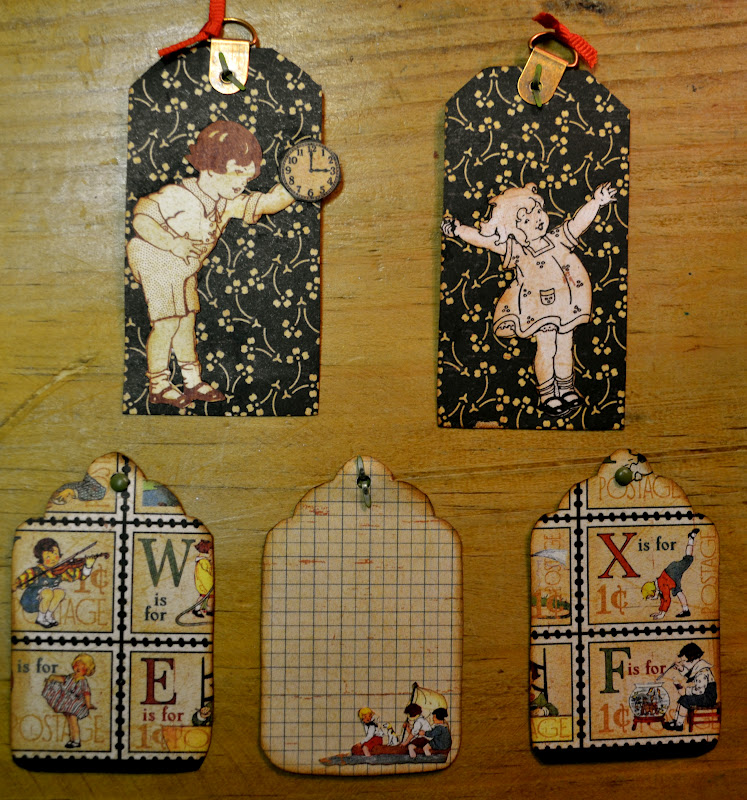
And this is the next 2 pages. I made some small pockets and filled them with cute tags for journaling and tags with space on the back for photos.

Here's a photo of some of those tags along with a ruler that I distressed and crackled.

On the next page I made an envelope pocket to hold a tiny tag.

Here's the little tag inside the envelope pocket. (Sorry for the bad photo).

And this is the inside of the tiny tag for a photo.

And here's the last 2 pages along with the back page.


6 Page Mini Book
IDBK0002

Main Letter Set Lower Case (Small)
IDA0005
Thanks for letting me share with you and I hope you enjoy!!
I have photos of each page posted on my blog and I'll have a tutorial for the mini book above on the ning site under tutorials. You can make this mini book out of one sheet of card stock, so fun!
Products Used:
Graphic 45 "A ABC Primer Paper Collection
Tim Holtz Distress Inks (Vintage Photo, Fired Brick, and Soot Black)
Tim Holtz Circle Charms
Crackle Medium
Adirondack Alcohol Inks (Stream, Copper, and Caramel)
Tim Holtz Tiny Tags and Tabs Die Cut
Graphic 45 Ribbon
Products Used For Small Alphas
Tim Holtz Fire Brick Distress Stain
Tim Holtz Distress Ink (Vintage Photo)
Crackle medium
For more of my work and details of the projects you can go to my blog:
Lost Coast Scrapper
Don't forget to leave a comment to have a chance to win some beautiful Imaginarium Designs chipboard!!


0 comments:
Post a Comment